

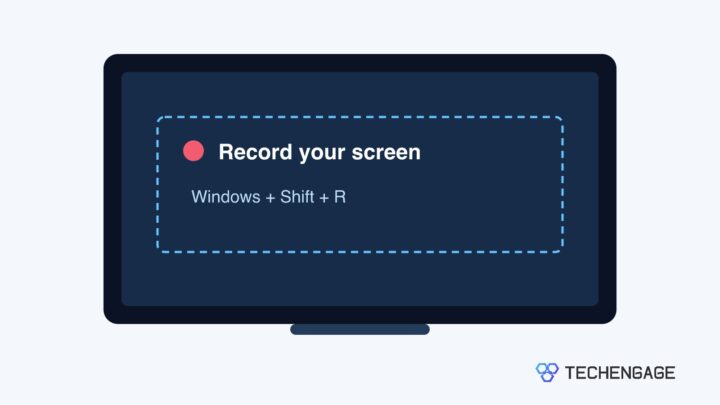
To screen record on Windows 11, press Windows + Shift + R, select the area you want to capture, and click Start. Use Snipping Tool’s microphone and system-audio controls to include your voice, the sound from your PC, or both. For an app or game, Windows + Alt + R starts and stops a Game Bar recording.
You do not need a paid recorder for a quick tutorial, a software demonstration, or a clip showing a problem. The important choice is what you want to capture: an area of the screen or activity inside one app.
Which Windows screen recorder should you use?
| What you need | Use | Start here |
|---|---|---|
| A selected area, including a desktop walkthrough | Snipping Tool on Windows 11 | Windows + Shift + R |
| An app or game recording | Xbox Game Bar | Open the app, then Windows + Alt + R |
| A still image rather than a video | Snipping Tool screenshot mode | Windows + Shift + S |
This guide uses Windows 11. Game Bar also provides recording on Windows 10, but the Windows 11 Snipping Tool video instructions do not apply to the older Windows 10 Snipping Tool. If you only need to show one error message, a Windows screenshot is usually easier to send.
Before you press Record
Close private messages, hide documents you do not want visible, and pause notifications. A screen recording can capture information that appears after you start, not just the window you checked beforehand. Ask other participants before recording a conversation.
Connect your microphone before opening the recorder. Make a 10-second test clip with a few spoken words and some PC audio, then play it back. That catches a muted microphone or the wrong audio source before you spend time recording the full explanation.
Record with Snipping Tool on Windows 11
Snipping Tool is the simplest starting point when you want to choose exactly which part of the screen appears in the video. Microsoft documents the selection and recording controls in its Snipping Tool guide.
- Open the page, app, or desktop area you want to show. Arrange the windows before starting so you do not have to tidy them during the recording.
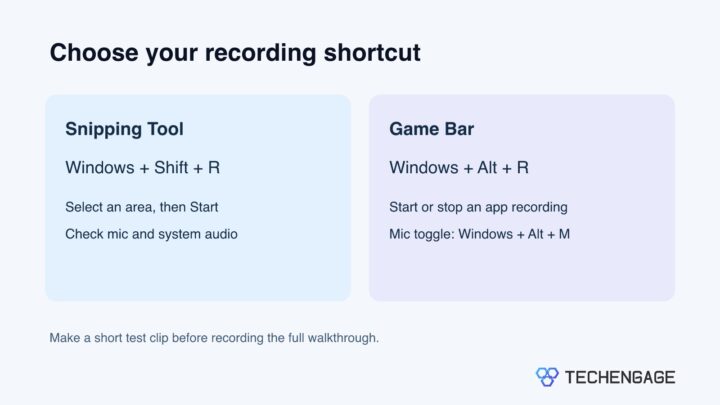
- Press Windows + Shift + R. Alternatively, search for Snipping Tool in Start, select Record, then select New.
- Drag to select the rectangular area to record. Include the menus you expect to open, but leave out unrelated windows.
- Check the microphone and system audio controls on the recording toolbar. Enable the microphone for narration; enable system audio for sounds playing on the PC. If a microphone selector is available, choose the connected mic you intend to use.
- Select Start and perform the actions you want to demonstrate. Keep the relevant windows inside the selected area.
- Select Stop when finished. Play the preview and listen to it before sharing.
- Use Save or Save as to keep the recording in a folder you can find. Give it a descriptive filename. You can also choose Edit in Clipchamp if you want to work on the clip further.
Microsoft added microphone and audio support to Snipping Tool alongside its screen-recording feature. If your copy has a Record button but no audio controls, check for an app update in Microsoft Store before relying on it for narration.
Record an app or game with Xbox Game Bar
Game Bar is useful when you want a keyboard shortcut to capture the app you are using. Open that app first rather than starting from an empty desktop. Microsoft’s Game Bar recording instructions confirm the shortcuts and the default save folder.
- Open the app or game you want to record and bring it to the foreground.
- Press Windows + G to open Game Bar. Check the audio and capture controls before the first recording. To include all PC audio, look in Game Bar’s capture settings for Audio to record and choose All. Settings placement can vary with the Game Bar version.
- Press Windows + Alt + M to turn microphone recording on or off. Check its displayed state rather than assuming the shortcut enabled it.
- Press Windows + Alt + R to start recording. Use the app normally.
- Press Windows + Alt + R again to stop.
- Open File Explorer > Videos > Captures to find the MP4. Play it to check both the picture and the sound.
Use Snipping Tool instead if you need to show a selected area across your desktop or if Game Bar will not capture the screen you need. Do not spend a long tutorial switching windows without first checking what your chosen recorder actually includes.
How to get the audio you want
Your voice only: enable the microphone and disable system audio in Snipping Tool. This suits a spoken walkthrough where notification sounds or background music would be distracting.
PC sound only: enable system audio and mute the microphone. This is useful for demonstrating an app’s sound without adding room noise.
Voice and PC sound: enable both, then make a test clip. Headphones help keep the sound from your speakers from being picked up a second time by the microphone. Lower the app volume if it makes your narration hard to hear.
For a longer narrated tutorial, our guide to recording clearer sound for YouTube covers microphone and recording considerations beyond the screen-capture button.
Fix missing sound, recording controls, or a black screen
The microphone is silent: check that it is enabled in the recorder, then confirm the intended input device in Settings > System > Sound. In Settings > Privacy & security > Microphone, check whether Windows allows microphone access for the recording app. A work-managed PC may have restrictions controlled by your organization.
You can hear yourself but not the app: check the system-audio control separately. Microphone access does not automatically mean the recorder is capturing PC sound. In Game Bar, recheck the audio-to-record option and make another short clip.
Windows + Shift + R does nothing: open Snipping Tool from Start and choose Record manually. If Record is missing, check your Windows version and update Snipping Tool through Microsoft Store. Windows + Shift + S opens screenshot mode, not video recording.
Game Bar will not start recording: bring the target app to the foreground and try again. If the task involves your desktop or moving between windows, use Snipping Tool’s selected-area recording. On a managed computer, ask your IT team about recording restrictions rather than changing security policies.
The video is black: first try recording an ordinary app window to see whether the problem affects every recording. Some content may restrict capture. Do not assume that a black recording means the entire recorder is broken, or try to bypass a service’s content protection.
You cannot find the file: check Videos/Captures for Game Bar. For Snipping Tool, save the clip explicitly to a named folder rather than depending on an automatic-save setting that may differ between versions.
Make the recording easier to follow
Increase the page zoom if viewers will watch on a phone. Move the pointer deliberately, pause briefly after opening a menu, and avoid dragging windows around while explaining a step. A short recording of one task is often more useful than a long clip with several unrelated problems.
Watch the saved file from beginning to end before sending it. Check the first and last frames for private information, and confirm that any text you refer to is readable. If you are helping someone on a Mac instead, use the separate Mac screen-recording guide; the Windows shortcuts here will not apply.
Frequently asked questions
Can Windows 11 record the screen without another app?
Yes. Snipping Tool records a selected area, and Xbox Game Bar records an app or game. You do not need to buy a screen recorder for these basic tasks.
What is the shortcut to screen record on Windows?
On Windows 11, Windows + Shift + R opens Snipping Tool’s recording selection. Windows + Alt + R starts or stops a Game Bar recording of the active app or game.
Can I record my voice and computer audio together?
Yes, with a current version of Snipping Tool, enable both microphone and system audio before starting. In Game Bar, check the audio-to-record setting and enable the microphone. Play a short test clip to confirm both sources are present.
Where does Windows save screen recordings?
Game Bar saves MP4 recordings in Videos/Captures by default. In Snipping Tool, use Save or Save as and choose a destination so you know where the clip is stored.



Share Your Thoughts