


Windows still gives you several built-in ways to capture the screen. On current Windows 10 and Windows 11 PCs, Microsoft’s main screenshot app is Snipping Tool. Older guides talked about Snip & Sketch as a separate app. That experience was folded into Snipping Tool, and the familiar Windows logo key + Shift + S shortcut still opens the capture overlay.
This guide covers the methods that still work in 2026 for taking screenshots on Windows 10 and Windows 11, plus where those files usually land on your PC.
Table of Contents
1. Snipping Tool (recommended)

Snipping Tool is the built-in capture app Microsoft documents for both Windows 10 and Windows 11. You can open it from Start by searching for Snipping Tool, or jump straight to the overlay with a keyboard shortcut.
Image snip modes include:
- Rectangle
- Freeform
- Window
- Full screen
How to take a screenshot with Win + Shift + S
- Press Windows logo key + Shift + S
- The snipping overlay opens at the top of the screen
- Choose Rectangle, Freeform, Window, or Full screen
- Capture the area you want
- Use the notification (or open Snipping Tool) to annotate, copy, save, or share
You can also open the Snipping Tool app first, pick a mode, then select New. Captures are copied so you can paste into chat, email, or an editor right away.
Video snips and extra Snipping Tool features
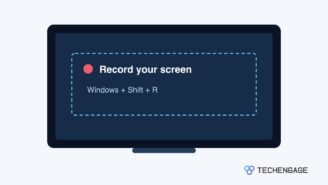
On supported Windows builds, Snipping Tool can record a rectangular area of the screen. Microsoft documents Windows logo key + Shift + R as the shortcut that opens the video snip overlay. After you stop recording, you can save the clip or continue editing in Clipchamp when that option is offered.
Other useful Snipping Tool options on current Windows 11 builds include delayed capture, markup tools (pen, highlighter, shapes), image crop, and Text actions for on-device OCR. Some AI helpers such as Perfect screenshot are limited to Copilot+ PCs, so they will not appear on every machine.
2. Print Screen key (PrtSc / PrtScr)
Press PrtSc (sometimes labeled PrtScr or Print Screen) to copy a full-screen image to the clipboard. Paste it into Paint, Word, or another app with Ctrl + V.
If you want the Print Screen key to open the Snipping Tool overlay instead, turn on the Print Screen shortcut in Windows Settings. On Windows 11, look under Settings > Accessibility > Keyboard for the option to use the Print Screen key to open screen snipping. On Windows 10 the same idea lives under Settings > Ease of Access > Keyboard. You may need to sign out or restart once after enabling it.
3. Windows logo key + Print Screen
Press Windows logo key + PrtSc to capture the full screen and save a file automatically. The display often dims briefly so you know the capture worked. Files usually land in your PicturesScreenshots folder.
Alt + PrtSc captures only the active window to the clipboard, which is handy when you do not want the whole desktop.
Where Windows saves screenshots
- Win + PrtSc and many Snipping Tool autosaves: This PC > Pictures > Screenshots (or OneDrivePicturesScreenshots if OneDrive is redirecting your Pictures folder)
- Win + Shift + S / PrtSc-to-overlay captures: copied to the clipboard first; save from the Snipping Tool window or notification if you want a file
- In Snipping Tool, open See more (⋯) > Settings to review autosave behavior when your build offers those controls
All common Windows screenshot shortcuts
- Windows logo key + Shift + S – open Snipping Tool image overlay
- Windows logo key + Shift + R – open Snipping Tool video overlay (supported builds)
- PrtSc – copy full screen to clipboard (or open snipping if you enabled that setting)
- Windows logo key + PrtSc – full screen capture saved to PicturesScreenshots
- Alt + PrtSc – copy the active window to the clipboard
If a shortcut does nothing on a laptop, check whether you need an Fn key with PrtSc, and confirm Snipping Tool is not disabled by policy on a work PC.



After reading your blog now I am working with the Snipping Tool. And it’s a very easy and helpful tool to take screenshots. Thanks for this wonderful piece of article and keep posting.
Thanks Sagartrivedi. It’s nice to know that you are finding this guide helpful.