A feature that was first introduced in Windows XP and has since then been practiced as a precaution might be at its end. In Windows 10 version 1809, Microsoft added the policy that allows you to quickly remove a USB device without needing to safely remove it first.
According to their new support page, all you have to do is navigate to a series of steps and enable Quick removal. You will have to do this manually the first time as the current policy favors high-performance.
Keep in mind that this can only be done on systems that are on Windows 1809 and above. You can check this by right-clicking on the start button and clicking on System. Scroll down in the system until you see Windows specifications and look at the Version.

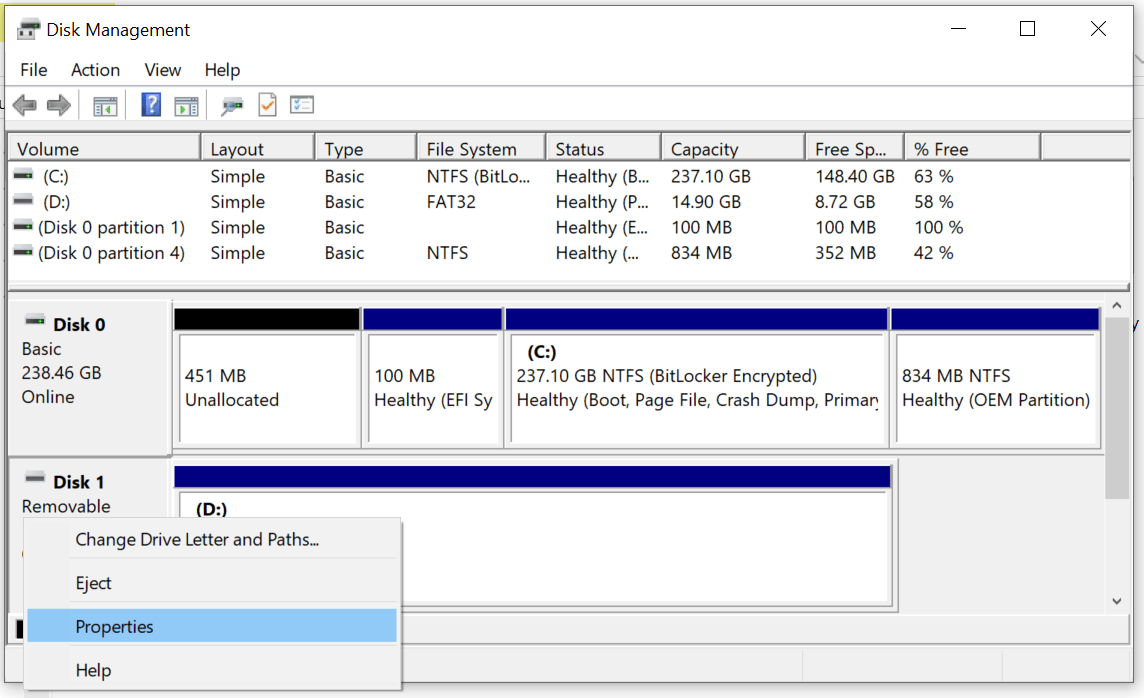
All you have to do is right-click on your start button and choose Disk Management. Choose the letter that your USB device is assigned. In this case, the USB device has been given the letter (D:). Right-click on (D:) in the lower section of Disk Management window and choose Properties.

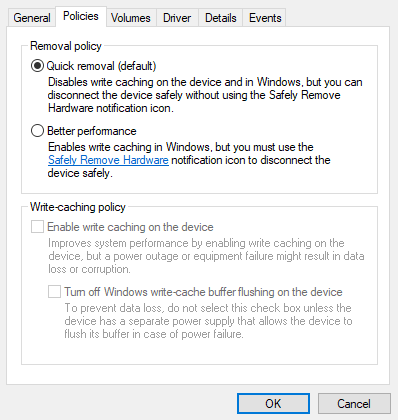
From here, click on the Policies tab, and choose Quick Removal.

Windows keeps it to Quick removal by default. You can select the policy that you want to use. You can either change to Better performance or keep the default option.
While Microsoft still has to roll out 1809 after having minor issues with the update in late 2018, the feature is definitely going to be very useful for people who are tech savvy and want to save time in copying data.
Albeit the difference between both policies is insignificant, it is always handy to save an extra step in ejecting an external medium, especially if you are in a hurry.
Safely removing a storage medium is a time-honored practice that dates back to the days of Windows XP, this stemmed with how horrendously slow Windows XP handled copying operations, but considering the modern state of fast data transmission, that is no longer a worry.


Share Your Thoughts