I replaced the water filter in my Samsung fridge last month after noticing the ice had a faint metallic taste. The filter indicator light had been on for three weeks — I’d just been ignoring it, like most people do. When I pulled the old cartridge out, the end cap was visibly discolored with a brownish-yellow tint that wasn’t there six months ago. That cartridge had been quietly failing for weeks, passing through contaminants it was supposed to catch.
Replacing a refrigerator water filter takes about five minutes and requires zero tools. But most households either forget to do it, don’t know how, or assume the water is fine because it “looks clear.” According to a U.S. Geological Survey study, roughly 45% of American tap water contains detectable levels of PFAS — the “forever chemicals” linked to cancer, thyroid disease, and immune system damage. Your fridge filter is one of the last barriers between those contaminants and your drinking glass. But only if the filter actually works, which it won’t if it’s six months past its replacement date.
This guide walks through the full replacement process for every common filter type, explains how to identify the right replacement cartridge, and covers the science behind why timing matters more than most people think.
Why Replacement Timing Actually Matters
A fresh refrigerator water filter uses activated carbon — either granular (GAC) or compressed into a solid block — to trap contaminants as water passes through. Chlorine, lead, mercury, volatile organic compounds, and certain pesticides bind to the carbon’s porous surface through a process called adsorption. Some higher-end filters add ion exchange resin to capture heavy metals and additional PFAS compounds.
The problem is that carbon has a finite adsorption capacity. Once the available surface area is saturated, contaminants pass straight through. Worse, the warm, damp environment inside a spent filter creates ideal conditions for bacterial colonization. A peer-reviewed study published in Scientific Reports found that expired household water filters harbored bacterial counts up to 10,000 times higher than unfiltered tap water. The trapped organic matter and moisture essentially turn a dead filter into a petri dish.
The National Sanitation Foundation has classified refrigerator water dispensers among the germiest spots in the kitchen, with concerning levels of mold and yeast detected in dispensers connected to overdue filters. Children, elderly family members, and anyone with a compromised immune system face the highest risk from bacterial exposure through filtered water that’s no longer actually being filtered.
When to Replace
Every major manufacturer — Samsung, LG, Whirlpool, GE, Frigidaire — recommends replacement every six months or after 200–300 gallons, whichever comes first. That timeline shortens if your household uses more water than average (five or more people), if you’re on well water with high sediment, or if your municipal water report shows elevated chlorine or contaminant levels.
Signs that your filter needs replacement sooner:
- Water tastes or smells different (metallic, chlorine-like, musty)
- Ice cubes are cloudy, smaller than usual, or have an off-taste
- Water flow from the dispenser has noticeably slowed
- The filter indicator light is on (don’t ignore this — it’s usually triggered by a timer or flow meter)
- Visible discoloration on the filter cartridge when removed
Find the Right Replacement Filter
Before you touch anything, you need the correct replacement cartridge. Using the wrong filter won’t just fail to work — it can cause leaks, damage the filter housing, or void your warranty. Here’s how to identify yours:
Check your owner’s manual. It lists the exact filter model number. If you’ve lost the manual, every manufacturer publishes them online — search your refrigerator’s model number (found on a sticker inside the fridge door or on the back panel) on the manufacturer’s website.
Read the existing filter. Pull out the current cartridge and look for the part number printed on it. Samsung filters are typically labeled DA29-00020B or HAF-CIN/HAF-QIN. LG uses LT700P, LT1000P, or LT120F. Whirlpool’s EveryDrop line uses numbered designations (EDR1RXD1 through EDR5RXD1). GE uses MWF, RPWFE, or XWFE. Frigidaire’s common models are WF3CB and ULTRAWF.
Use the manufacturer’s filter finder tool. Samsung, LG, and Whirlpool all have online filter finders where you enter your refrigerator model number and get the exact compatible filter. This is the most reliable method if you’re unsure.
OEM vs. Third-Party Filters
OEM (original equipment manufacturer) filters cost $40–60 each, which means $80–120 per year if you replace twice annually. Third-party alternatives from brands like Glacier Fresh, Waterdrop, and FilterLogic run $15–25 — roughly half the price.
Are aftermarket filters safe? The honest answer: it depends entirely on certification. A third-party filter with genuine NSF/ANSI 42 and 53 certification has been independently tested to meet the same contaminant reduction standards as OEM filters. Many reputable aftermarket brands do carry these certifications and perform comparably in independent testing.
The danger lies in counterfeit and uncertified filters, which are disturbingly common online. Test purchases by GE and independent researchers have found counterfeit filters with no proper carbon block inside, made from unsafe plastics, that fail to reduce chlorine, lead, or sediment. If you go aftermarket, verify the NSF certification independently on NSF’s certified product database and buy from established retailers — not random marketplace sellers with no brand history.
Understand NSF Certifications (They’re Not All Equal)
When shopping for a filter, you’ll see “NSF certified” thrown around constantly. But there are different certification standards, and each covers different contaminants:
NSF/ANSI 42 covers aesthetic contaminants — chlorine taste and odor, particulate matter, and cloudiness. This is the baseline certification. If your filter only has NSF 42, it makes your water taste better but doesn’t necessarily remove health-threatening contaminants.
NSF/ANSI 53 covers health-related contaminants — lead, mercury, asbestos, volatile organic compounds, cysts (Cryptosporidium, Giardia), and as of recent updates, PFOA and PFOS. This is the certification that matters most. A filter tested to NSF 53 standards for lead must reduce concentrations from 150 micrograms per liter down to 5 or less — essentially a 97%+ reduction rate.
NSF/ANSI 401 covers emerging contaminants — pharmaceuticals (ibuprofen, naproxen, estrone), certain pesticides, herbicides, and BPA. Whirlpool’s EveryDrop line is one of the few refrigerator filter brands that carries this certification alongside 42 and 53.
For most households, a filter carrying both NSF 42 and 53 provides solid protection. If your local water report shows pharmaceutical contamination (increasingly common — research has documented rising pharmaceutical levels in water supplies), look for NSF 401 certification as well.
How to Replace the Filter: Step by Step
The physical process varies slightly depending on your filter type, but there are only three common mechanisms used across all major brands. Identify yours and follow the matching instructions below.
Before You Start
Have a hand towel ready — a small amount of water will drip when you remove the old filter. Place the towel under the filter compartment. You do not need to turn off the water supply to the refrigerator for most internal filter replacements (twist-in and push-in types). Inline filters installed behind the fridge do require shutting off the water valve first.
Type 1: Twist-In Filters (Quarter-Turn)
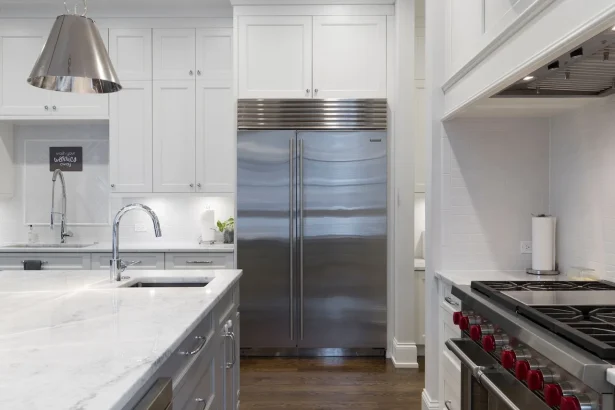
Found in most Samsung, GE, and many LG models. The filter is typically located inside the refrigerator compartment — upper right corner or center ceiling area.
- Open the filter compartment cover (some swing open, others pop off).
- Grip the old filter and turn it counterclockwise (about a quarter turn) until it releases.
- Pull the filter straight out. Some water will drip — this is normal.
- Remove any protective caps or plastic wrap from the new filter. If the old filter has a reusable cap, transfer it to the new one.
- Insert the new filter into the compartment and turn clockwise until it locks into place with a click or stops turning. Don’t force it — if it won’t turn, it’s likely misaligned. Pull it out slightly and try again.
- Close the compartment cover.
Type 2: Push-In Filters
Common on Whirlpool, KitchenAid, Maytag, and Frigidaire models. Usually located in the base grille (lower left or right) or inside the fridge near the bottom.
- Press the eject button next to the filter. On base grille models, you may need to open the grille cover first.
- The filter will release and slide out partially. Pull it the rest of the way out.
- Remove the cap from the old filter and attach it to the new one (if applicable).
- Slide the new filter into the compartment until it clicks into place. You should feel definite resistance followed by a click.
- If the filter has a cap, ensure the cap handle is in the locked (vertical) position.
Type 3: Inline Filters (Behind the Refrigerator)
Found on older models and some budget refrigerators. The filter connects to the water supply line behind or underneath the unit.
- Turn off the water supply valve — this step is mandatory for inline filters. The valve is usually under the kitchen sink or in the basement.
- Carefully pull the refrigerator away from the wall enough to access the back panel.
- Locate the inline filter on the water supply line. It’s a cylindrical canister connected by push-fit or compression fittings.
- Press the release tabs on the quick-connect fittings (or unscrew compression nuts) and disconnect the old filter. Have the towel ready — residual water will drain from the line.
- Connect the new filter, ensuring the flow direction arrow on the filter body points toward the refrigerator (away from the wall valve).
- Turn the water supply back on and check every connection point for leaks.
- Push the refrigerator back into position.
Flush the New Filter Before Using
Every new carbon filter contains loose carbon particles (carbon fines) left over from manufacturing. If you skip the flush, your first few glasses of water will be gray or black and taste like charcoal. It’s harmless but unappetizing.
Run approximately three to four gallons of water through the dispenser and discard it. That’s roughly four to five minutes of continuous dispensing, or about 12–16 standard glasses. The water will start out cloudy or gray and gradually clear. Once it runs completely clear and the dispenser pressure feels normal, the filter is ready for use. Discard the first one or two batches of ice as well, since ice made during the flush period may contain carbon fines.
Reset the Filter Indicator
Most modern refrigerators have a filter status indicator — a light that turns yellow or red, or a notification in the display panel. After replacing the filter, you need to manually reset this indicator. The method varies by brand:
Samsung: Press and hold the “Ice Type” or “Water Filter” button for 3 seconds until the indicator light changes color (red → blue or green).
LG: Press and hold the “Filter” button on the display panel for 3–5 seconds until the indicator resets.
Whirlpool/KitchenAid/Maytag: Press and hold the “Water Filter” or “Filter Reset” button for 3 seconds. On models without a dedicated button, press “Max Cool” and “Max Ice” simultaneously for 3 seconds.
GE: Press and hold the “Reset Water Filter” button for 3 seconds. On models with a dial, turn it to the reset position.
Frigidaire: Press and hold the “Filter Reset” button for 3 seconds until the status light turns green.
If your refrigerator has smart connectivity (Samsung SmartThings, LG ThinQ, GE SmartHQ), the filter status also resets in the companion app. These apps can send push notifications to your phone when the next replacement is due — a genuinely helpful feature for anyone who tends to forget. If you manage other smart home devices, these apps likely integrate with your existing setup.
What Your Filter Actually Removes (And What It Doesn’t)
Refrigerator water filters are effective but not comprehensive. Understanding their limits helps you decide whether you need additional filtration.
What most fridge filters remove well: Chlorine taste and odor, sediment, lead, mercury, certain pesticides, cysts (Cryptosporidium, Giardia), and — if NSF 53 certified for PFAS — PFOA and PFOS. Premium filters like Whirlpool’s EveryDrop 1 also reduce pharmaceuticals and BPA.
What fridge filters generally don’t remove: Total dissolved solids (TDS), sodium, fluoride, nitrates, bacteria and viruses (unless specifically UV or hollow-fiber equipped), and the full range of newer PFAS compounds beyond PFOA/PFOS. If your water report shows elevated levels of these contaminants, you may want a dedicated under-sink reverse osmosis system in addition to your fridge filter.
You can check your local water quality for free through the EWG’s Tap Water Database by entering your zip code. The database cross-references your water utility’s test results against health guidelines and identifies which contaminants exceed recommended levels. Nearly 79% of the 18,774 water systems tracked have at least one contaminant above health guidelines — so checking is worthwhile even if your water tastes fine.
The PFAS Problem and What It Means for Your Filter Choice
PFAS (per- and polyfluoroalkyl substances) have dominated water safety news since 2024, when the EPA finalized the first-ever national drinking water standards for six PFAS compounds. The Environmental Working Group has mapped over 9,700 PFAS-contaminated sites across all 50 states, and an estimated 176 million Americans live in communities where tap water has tested positive for these compounds.
For refrigerator filter buyers, the practical question is: does your filter actually capture PFAS? The answer depends on certification. Filters tested to NSF/ANSI 53 for PFOA and PFOS must reduce those specific compounds to below 20 parts per trillion. Carbon block filters generally outperform granular activated carbon at PFAS reduction, because the denser structure provides more contact time with the water. Ion exchange resin (found in some premium filters) adds another layer of PFAS capture.
The EPA maintains a resource for identifying drinking water filters certified to reduce PFAS, which is worth checking against your specific filter model. Keep in mind that the PFAS family includes thousands of compounds, and current NSF standards only test for a handful. If PFAS is a primary concern in your area, a reverse osmosis system under the sink provides more comprehensive removal.
Maintenance Between Replacements
A few habits extend filter performance and keep your water tasting clean throughout the six-month replacement cycle:
Wipe down the dispenser nozzle weekly. The spout where water exits collects moisture, mineral deposits, and eventually mold. A quick wipe with a damp cloth prevents buildup that can affect taste and harbor bacteria independent of the filter itself.
Run a glass of water daily even if you don’t drink it. Water sitting stagnant in the line between the filter and the dispenser can develop an off-taste. Running a brief flush — especially first thing in the morning — clears the line. If you’re going on vacation for a week or more, flush the lines when you return before drinking.
Check water pressure periodically. A noticeable decline in dispenser flow usually means the filter is clogging with sediment. If flow drops significantly before the six-month mark, replace the filter early rather than waiting. Running water through a clogged filter under high pressure can push trapped contaminants back into the water stream.
Clean the filter housing during replacement. When you pull the old filter out, wipe the inside of the housing with a diluted white vinegar solution (one part vinegar to three parts water) to remove mineral deposits and any slime buildup. Rinse with plain water before inserting the new filter. The acetic acid in vinegar dissolves mineral scale without leaving chemical residue.
Filter Replacement Cost Breakdown
Understanding the real cost helps you budget properly and evaluate whether aftermarket filters offer genuine savings:
| Filter Type | Cost Per Filter | Annual Cost (2 replacements) | Cost Per Gallon Filtered |
|---|---|---|---|
| OEM (Samsung, LG, etc.) | $40–60 | $80–120 | $0.13–$0.20 |
| Premium OEM (EveryDrop, RPWFE) | $50–70 | $100–140 | $0.17–$0.23 |
| Certified aftermarket | $15–25 | $30–50 | $0.05–$0.08 |
| Uncertified generic | $8–15 | $16–30 | Not recommended |
For context, a single case of bottled water (24 bottles) costs roughly $5–8 and produces significant plastic waste. A household buying two cases per week spends $520–830 per year on bottled water. Even the most expensive OEM fridge filter costs a fraction of that while producing far less waste. The economic case for filtered tap water over bottled water is overwhelming regardless of which filter tier you choose.
Dispose of Old Filters Responsibly
Used water filters contain trapped contaminants and spent carbon that shouldn’t go into regular recycling streams. However, they’re also not hazardous waste in most jurisdictions, so regular trash disposal is technically acceptable.
Better options exist. Several filter manufacturers now offer take-back recycling programs. Brita partners with TerraCycle for free mail-in recycling of used filters. Some municipalities accept used water filters through their household hazardous waste collection programs. Check your local recycling guidelines or the manufacturer’s website for brand-specific recycling options.
If you do dispose in regular trash, seal the used filter in a plastic bag to prevent residual water and trapped contaminants from leaking into the waste stream.
Troubleshooting Common Issues After Replacement
Water is cloudy or gray after replacement. This is carbon fines — completely harmless. Continue flushing water through the dispenser until it runs clear. Three to four gallons typically clears it. If cloudiness persists after five gallons, remove and reseat the filter to ensure proper alignment.
Water leaks from the filter area. The filter likely isn’t fully seated. Remove it and reinstall, making sure twist-in filters lock completely (you should feel or hear a click) and push-in filters snap firmly into place. Check for cracked or missing O-rings on the filter or housing. If leaking continues, the filter may be incompatible with your model — double-check the part number.
Water dispenser flow is very slow. The new filter might have an air lock. Try dispensing water in short bursts (3–5 seconds on, 3–5 seconds off) to work the air through the system. If slow flow persists, check that you removed all packaging material and protective caps from the filter. Some filters ship with foam plugs in the inlet and outlet ports that are easy to miss.
Filter indicator won’t reset. Try unplugging the refrigerator for 30 seconds, then plugging back in and attempting the reset procedure again. On some models, the reset button must be held for a full 5 seconds rather than the typical 3. Consult your specific model’s manual if the standard reset procedure doesn’t work — a few older models require a different button combination.
Water tastes worse after replacement. If you flushed adequately and the water still tastes off, the issue may not be the filter. Check whether your municipal water supply has changed treatment methods (common in spring/summer). Run the faucet tap without the fridge filter to compare — if the tap water tastes the same, the filter isn’t the problem. Also verify the filter is genuine and NSF-certified, especially if purchased from a third-party seller online.
Set a Replacement Reminder
The single most effective thing you can do after installing a new filter is set a reminder to replace it again in six months. The filter indicator light helps, but people get desensitized to dashboard warnings they see every day. Set a calendar reminder on your phone, use your smart home app’s scheduling feature if your fridge has smart connectivity, or write the installation date on the filter housing with a marker.
Some subscription services (offered by both OEM brands and aftermarket filter companies) automatically ship a replacement filter on a six-month schedule. If you tend to procrastinate on maintenance tasks, an auto-delivery subscription eliminates the friction entirely — the filter shows up at your door, and the only step left is the five-minute swap.
Clean water isn’t something you think about until it’s gone. A $40 filter replacement twice a year is one of the cheapest health investments you can make for your household. Five minutes, no tools, and you’re protected for another six months. There’s genuinely no reason to put it off.


Share Your Thoughts