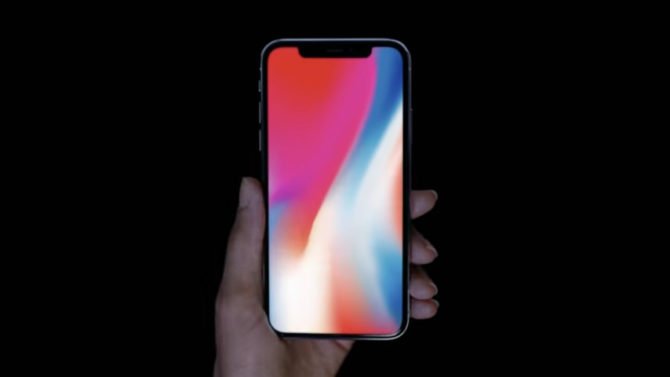
Not everyone can afford the new $999 iPhone X, iPhone XR or iPhone XS and XS Max. Or perhaps, you have your own preferences that make you stick to Android. Of all other things, one thing we can say for sure is that Apple puts in a lot of effort to give its users the best user experience through its devices.
The iPhone includes services like gestures that take the user experience to a whole new level! Some Android phones such as the ones from Oppo have given it a shot to design experience similar to the gesture-based navigation system Apple has introduced. Even the freshly released Android P has some of Google’s own gestures added in it.
You may want the great user experience Apple gives out while benefitting from all the amazing features Android provides. If this is the case, you have reached the right place! This guide tells you exactly how to incorporate iPhone gestures into your Android.
Also Learn: You can now use your PC to send and receive SMS messages
Also Read: 7 Reasons to choose an Android phone instead of Apple
Setting up iPhone gestures requires a little meddling with your phones and using the command line to change a few things. If you are not comfortable in doing so, read no further! 🙂
Setting up your phone
The first step towards this is to install the Navigation Gestures app from the Google Play store. The app has been beautifully developed by XDA Developers and allows you to configure your phone’s UI to work like either the One Plus or iPhone X. There are multiple configuration options that give you the freedom to add a personal touch to the way your UI works. Go on and grab the premium add-on for $1.49.
The app requires certain permissions that need to be allowed for in order for the app to work. One of such permissions has to be allowed using your PC’s terminal or command prompt. In order to do so, you need to install the Android Developer’s tool. You can follow this amazing tutorial by LifeHacker to do so.
Once you have all the tools set up on your PC, you need to enable the ADB debugging mode on your device. This can be done by going to your phone settings and About phone. Tap the Build Number a number of times to enable the Developer Options. Enable USB debugging from the Developer Options menu.
Connect your phone to your PC and allow all permissions required in the prompts that appear. Enter the following commands in your PCs Terminal or Command Prompt window:
adb shell pm grant com.xda.nobar
android.permission.WRITE_SECURE_SETTINGS
The Navigation Gestures app will now have all the required permissions to make changes to your device’s UI.
Customizing the UI
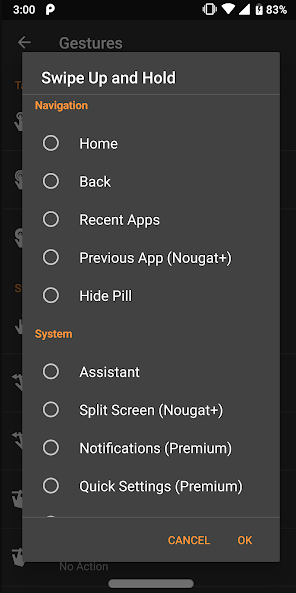
Now is the time to dive into the configurations. At first, enable the Gesture Pill and Hide Navigation Bar option. These options will hide the original navigation bar while enabling gestures.
Note: If you want to revert back to your original phone UI, you must undo these settings before uninstalling the app.
Further options and settings are available in the Appearance and Behaviour options. Users can choose from various options to set up the device as they need. In order to configure the behavior options most close to the iPhone experience, choose the following:
- Swipe Up: home
- Swipe Down: Notifications
- Swipe Up and Hold: recent apps
- Swipe Right: previous app
- Swipe Left: back
- Tap and Hold: Launch Google Assistant
These basic behavior settings will be enough to have an unbeatable iPhone experience on your device. You may also want to make the pill a bit wider and the swipe distance to be 4 pixels to make the UI look closer to the iPhone X. Other options can be changed as well.
To add the swipe to go back gesture, you need to install Edge Gestures. The app allows us to enable gestures from the edge of our screen. Set the swipe to the right option to the Android back button and turn off the visual feedback settings. Also, make sure that the gesture is disabled on the home screen and no other gesture is configured. Once done, you are good to go!
Go on and enjoy a seamless user experience of iPhone X with all the perks your Android phone has!


Share Your Thoughts