

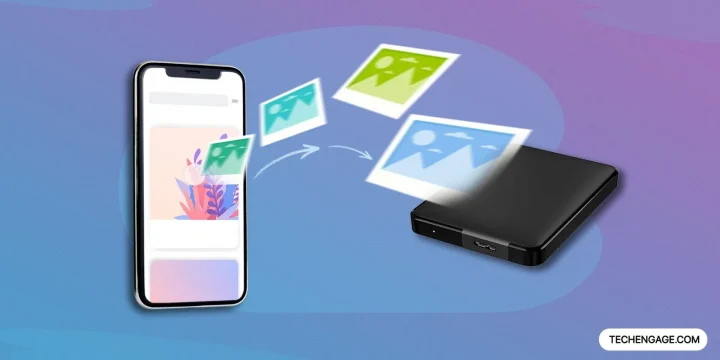
The single biggest change to this question since Apple shipped the iPhone 15 in September 2023 is that the iPhone now has USB-C. Plug a $20 SanDisk or Samsung T7 USB-C SSD directly into an iPhone 15, 16, or 17 series, open the Files app, and you can drag photos straight onto the external drive without a computer in the middle. The “transfer photos from iPhone to external hard drive” problem essentially solved itself for new iPhones in 2024.
That has not made all the other methods obsolete – Lightning-era iPhones (iPhone 14 and earlier) still exist in large numbers, and the computer-based workflows are still the right answer for one specific job: moving the entire camera roll, intact, with metadata preserved, to a permanent archive. This guide covers the six methods that work in 2026, ranked by which one is right for which situation.
1. Direct USB-C SSD to iPhone 15+ (the 2024+ default)
Works on: iPhone 15, 15 Plus, 15 Pro, 15 Pro Max, 16 series, 16 Pro series, 16e, 17 series (any iPhone with a native USB-C port).
This is the method to use if you have a USB-C iPhone and a USB-C external drive. No computer, no software, no cloud round-trip.
- Connect your USB-C iPhone directly to a USB-C-enabled external SSD or hard drive using a USB-C cable. SanDisk Extreme Portable SSD, Samsung T7 Shield, Crucial X9 Pro, and OWC Envoy Pro all work without setup. The iPhone supports USB 3 on the Pro models (10 Gbps) and USB 2 on the non-Pro (480 Mbps) – both are fine for photo transfer.
- Open the Files app on the iPhone. The external drive appears under Locations alongside iCloud Drive and On My iPhone.
- Open Photos, select the photos you want to move, tap the share icon, and pick Save to Files. Choose the external drive as the destination. The transfer happens at native USB speed.
The Pro iPhones (15 Pro / 16 Pro / 17 Pro) can record ProRes video directly to the external SSD, bypassing internal storage entirely. Apple’s documentation on recording ProRes to external storage covers this in detail. For 4K 60 fps ProRes, internal storage fills in minutes; external SSD is the only practical option for any serious capture.
The catch: the external drive must be formatted as exFAT or APFS, not Mac-only HFS+ or Windows-only NTFS. Most retail USB-C SSDs ship as exFAT, which works fine.
2. Windows Photos app (for Windows users)
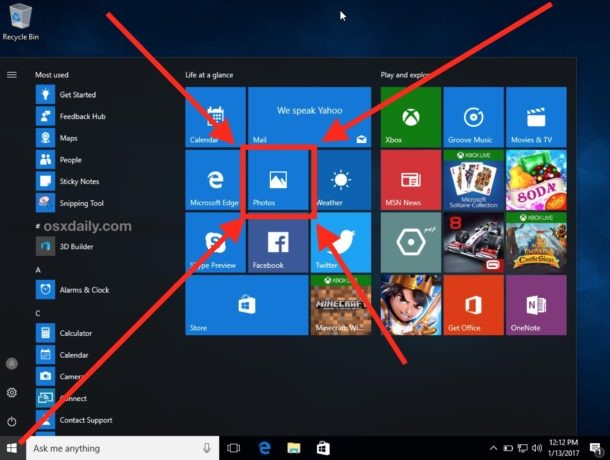
Works on: any iPhone, Windows 10 / 11 PC, any external drive plugged into the PC.
Microsoft rebuilt the Photos app on Windows 11 with a faster import pipeline. For a Windows user with a Lightning iPhone or who prefers to use a computer as the middle hop, this is the cleanest option.
- Connect both the iPhone and the external hard drive to the Windows PC. Unlock the iPhone and tap Trust This Computer if prompted.
- Open the Photos app on Windows. Click Import → From a USB device. The iPhone shows up in the list of available devices.
- Before clicking Import, click Import settings and change the destination folder to a path on your external drive (e.g.
E:\iPhone Backup\2026-05). - Select the photos to transfer or pick the whole roll. Click Import.
The Windows Photos app converts HEIC and HEVC to JPEG/MP4 on import if you have not installed Microsoft’s free HEIF Image Extensions and HEVC Video Extensions from the Microsoft Store. Install both before importing if you want to preserve the original HEIC files at full quality.
3. File Explorer DCIM transfer (Windows)
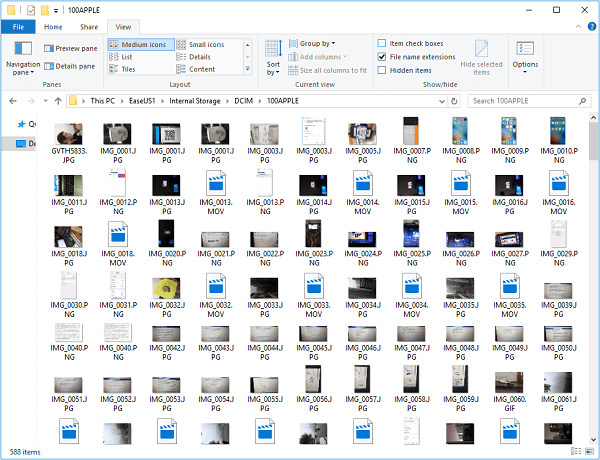
Works on: any iPhone, any Windows PC, any external drive. No app needed.
The lowest-friction option on Windows. iPhones expose their camera roll as a standard MTP (Media Transfer Protocol) device, so File Explorer can browse them like a USB stick.
- Connect the iPhone and the external drive to your Windows PC.
- Unlock the iPhone and tap Allow on the access prompt.
- Open File Explorer. Navigate to This PC → Apple iPhone → Internal Storage → DCIM. You’ll see folders named
100APPLE,101APPLE, etc. Each holds a chunk of the camera roll. - Select all the files (or specific folders) and drag them onto the external drive. Standard copy-paste behaviour.
The advantage of this method is that you get the raw files with original filenames intact. The disadvantage is that albums, captions, and Live Photo pairings are not preserved – only the underlying media files. For an unstructured archive, this is fine; for a library you intend to keep organised, the Photos-app methods are better.
4. Image Capture (macOS)
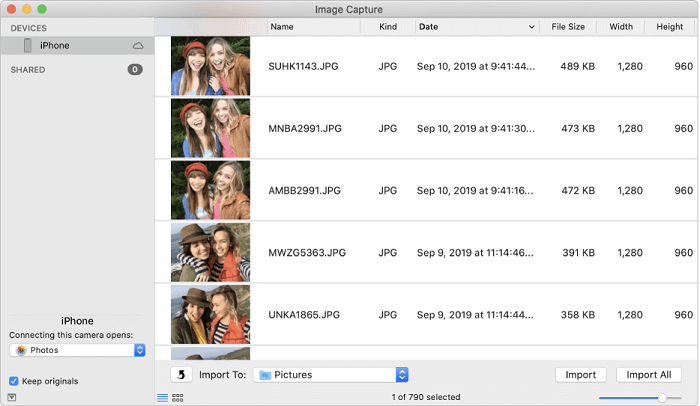
Works on: any iPhone, any Mac (Apple Silicon and Intel), any external drive.
Image Capture is the macOS equivalent of File Explorer’s iPhone view – a built-in app, no library to manage, point-and-click import to any destination folder. Most Mac users overlook it because it lives in Applications > Utilities rather than the main Applications folder.
- Connect the iPhone and external drive to the Mac.
- Open Image Capture (Spotlight: Cmd+Space, type “image capture”).
- Select your iPhone in the Devices list on the left.
- In the bottom-left, set Import To to a folder on your external drive.
- Click Import All to move the entire roll, or select specific photos and click Import.
Image Capture’s strongest feature: under the gear menu, you can toggle Delete after import, which removes photos from the iPhone after a successful copy. This is the cleanest way to free up iPhone storage in bulk – and it’s a function the Photos app does not offer in the same straightforward way.
5. Photos app (macOS)
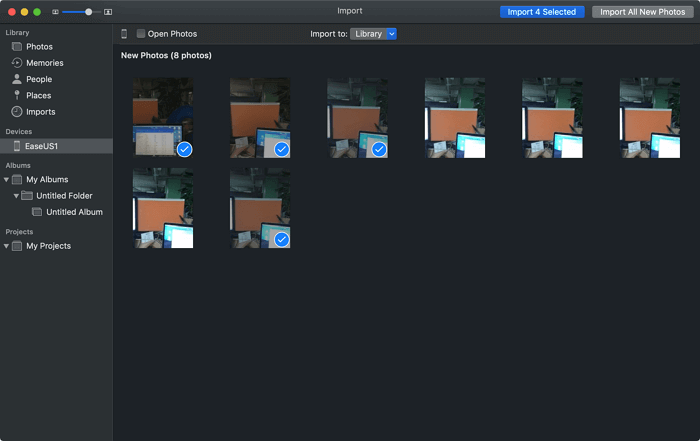
Works on: any iPhone, any Mac, any external drive. Best when you also want library management.
If you keep your Mac’s Photos library on an external drive (a common setup for users with large libraries), the Photos app is the right import path because it preserves albums, Live Photos pairings, edits, and metadata that other methods drop.
- Make sure your Photos library is on the external drive. To create a library there: hold Option while launching Photos, click Other Library, and create a new library on the external drive. Then double-click the new library to make it the active one.
- Connect the iPhone.
- Photos detects the iPhone and shows it in the sidebar under Devices.
- Click Import All New Photos, or select specific photos and click Import [n] Selected.
Caveat: keeping a Photos library on an external drive means the drive must be connected for Photos to open. If you unplug the drive while Photos is running, the app freezes until the drive returns. For laptops that move around, this is the main reason many users stay with internal-library + external-backup setups instead.
6. DearMob iPhone Manager and other third-party tools
Works on: any iPhone, Windows and macOS. Best when you want automatic HEIC→JPEG conversion at transfer time.
DearMob iPhone Manager and similar third-party iOS-management tools (iMazing, AnyTrans, CopyTrans) sit on top of the same MTP interfaces the built-in tools use, but layer in transfer-time conveniences:
- Automatic HEIC to JPEG conversion for compatibility with non-Apple tools
- Hardware acceleration that can be noticeably faster than the built-in Photos app on Windows (less of a difference on macOS)
- Album, Memory, and tag preservation that Image Capture and File Explorer drop
- Selective transfer by date, album, location, or photo type (Live Photo, RAW, ProRAW)
The trade-off is cost and trust. DearMob is paid software with a free trial; iMazing has a similar model; CopyTrans has a 50-file free trial. All three are reputable. The honest assessment in 2026: for one-off transfers, the free built-in tools cover the same ground. For repeat, large-scale archival where HEIC→JPEG conversion or album preservation matters, the paid third-party tools save real time.
For more on iPhone-side tooling, our guides on transferring photos from PC to iPhone without iTunes, speeding up older iPhones, and iPhone tips and tricks cover adjacent workflows.
Which method should you use?
| Situation | Best method |
|---|---|
| USB-C iPhone (iPhone 15+) + USB-C SSD, occasional photo transfer | Method 1: Direct USB-C |
| Lightning iPhone, Windows PC, one-off transfer | Method 3: File Explorer DCIM |
| Lightning iPhone, Windows PC, recurring archival | Method 2: Photos app for Windows |
| Any iPhone, Mac, want to free up iPhone storage at the same time | Method 4: Image Capture |
| Any iPhone, Mac, want library-managed import with metadata | Method 5: Photos for Mac |
| Large archive with HEIC→JPEG conversion needed | Method 6: DearMob / iMazing / AnyTrans |
| iPhone Pro recording ProRes 4K 60 | Method 1: Direct USB-C (only practical option) |
FAQ
Can I plug an external hard drive directly into an iPhone?
Yes, on iPhone 15 and later. Apple switched the iPhone’s port to USB-C in September 2023, which lets you connect USB-C external SSDs and hard drives directly without an adapter. Open the Files app to see the drive under Locations. iPhone 14 and earlier (Lightning port) need a Lightning-to-USB adapter (the official Apple Lightning to USB Camera Adapter at $39 is the most reliable option).
How do I copy my entire iPhone library to an external hard drive at full quality?
On Mac: use Image Capture’s Import All function, set the destination to a folder on your external drive. This preserves original HEIC and ProRAW files at full quality. On Windows: install the HEIF and HEVC extensions from Microsoft Store first, then use the Photos app’s Import All. The DCIM folder method via File Explorer also gives you everything but loses album organization.
What format does my external drive need to be in?
exFAT for cross-platform compatibility (works on iPhone, iPad, Mac, Windows). APFS if you only use Mac. NTFS works on Windows but is read-only on Mac unless you install third-party software. HFS+ Mac-only is also read-only on Windows. Most retail USB-C SSDs ship as exFAT, which is the right default.
Will my photos transfer as HEIC or JPEG?
By default, HEIC is preserved if you copy via Files app (USB-C direct), File Explorer DCIM, or Image Capture. The Windows Photos app and the macOS Photos app preserve HEIC if the destination supports it. Third-party tools like DearMob and iMazing can automatically convert HEIC to JPEG on transfer if you prefer wider compatibility – useful if the photos will be edited in older software that doesn’t read HEIC.
Should I use iCloud Photos instead of transferring to an external drive?
They solve different problems. iCloud Photos keeps your library accessible across devices and survives a lost phone, but you pay monthly for storage beyond the free 5 GB tier (50 GB / $0.99, 200 GB / $2.99, 2 TB / $9.99, 6 TB / $29.99, 12 TB / $59.99 in 2026). An external drive is a one-time hardware cost and gives you a local, offline copy that survives an account compromise or iCloud outage. The complete archival strategy uses both: iCloud for active access, external drive for offline backup.





None of these methods effectively changes the iPhone file extension .heic to .jpg, so none of these methods work!! Any iPhone pic that has been edited on the iPhone becomes a .heic
Sorry those HEIC steps failed for you. On current iOS, the most reliable built-in path is Settings → Camera → Formats → Most Compatible (for new shots as JPEG), or for existing HEIC files use Files/Photos export, or Shortcuts’ Convert Image action. If you tell me your iOS version, I will point to the exact screens.
Hi,
In your article about how to transfer photos and videos directly from an iPhone to external hard drive, you mentioned that Apple documented this in the URL entitled “Apple’s documentation on recording ProRes to external storage”. However, it appears to be the wrong link since that leads to an Apple article concerning Xcode 15 security content.
The link is located in the paragraph which begins:”The Pro iPhones (15 Pro / 16 Pro / 17 Pro) can record ProRes video directly to the external SSD, bypassing internal storage entirely.” The incorrect link follows this statement.
You are right — that ProRes documentation link was pointing at the wrong Apple page (Xcode security content). Thank you for catching it. I am fixing the URL in the article now so it matches the ProRes-to-external-storage documentation. Appreciate the careful read.