Ever since Windows 10 has launched its notification panel, named Action Center, the notifications have improved greatly with time from Windows 7’s balloon notifications. Notifications carry significant pieces of information and also deal with the aspect of user interaction. Hence, their configuration, usage, and management should also be the subject of utmost attention. Therefore, we have brought the guide for using and configuring the new Action Center in Windows 10.
Following are the quick steps to manage your Action Center on Windows 10.
Find the icon of Action Center
At the bottom left corner of the screen, there will be a message-shaped icon. ![]()
The notifications
The messages from the applications appear on the panel.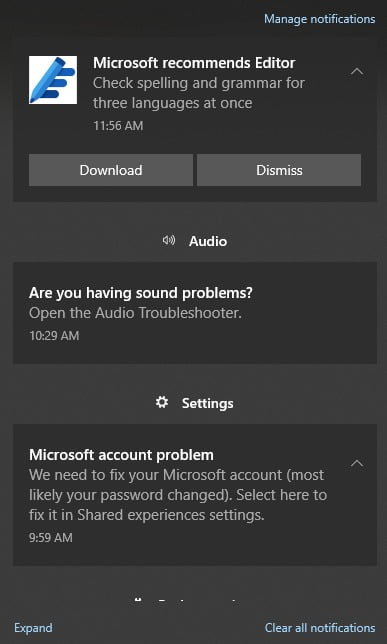
Quick actions
At the bottom of the panel, there will be Quick actions in their collapsed form. You can change the notification sender app through Settings which is discussed later.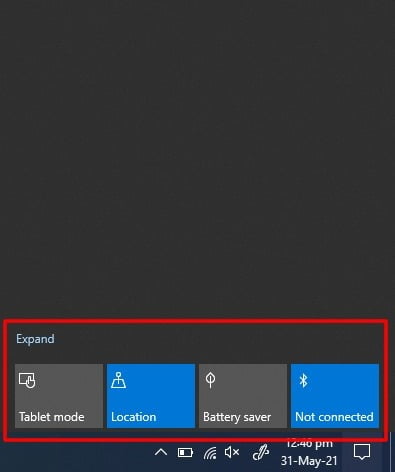
Expanded Quick actions
You can expand the Quick action panel and also explore other apps as well.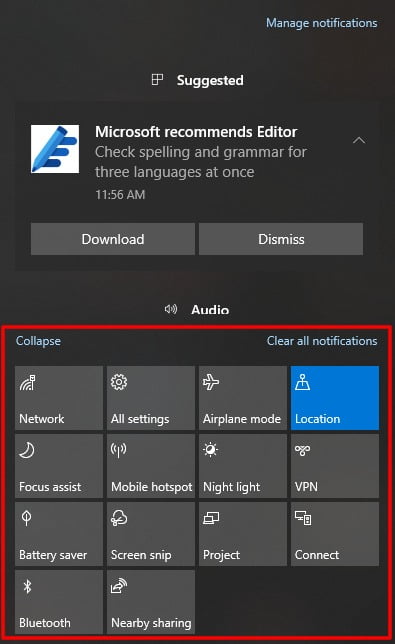
Enter Settings
Open “Settings” from the Start menu and click “System.”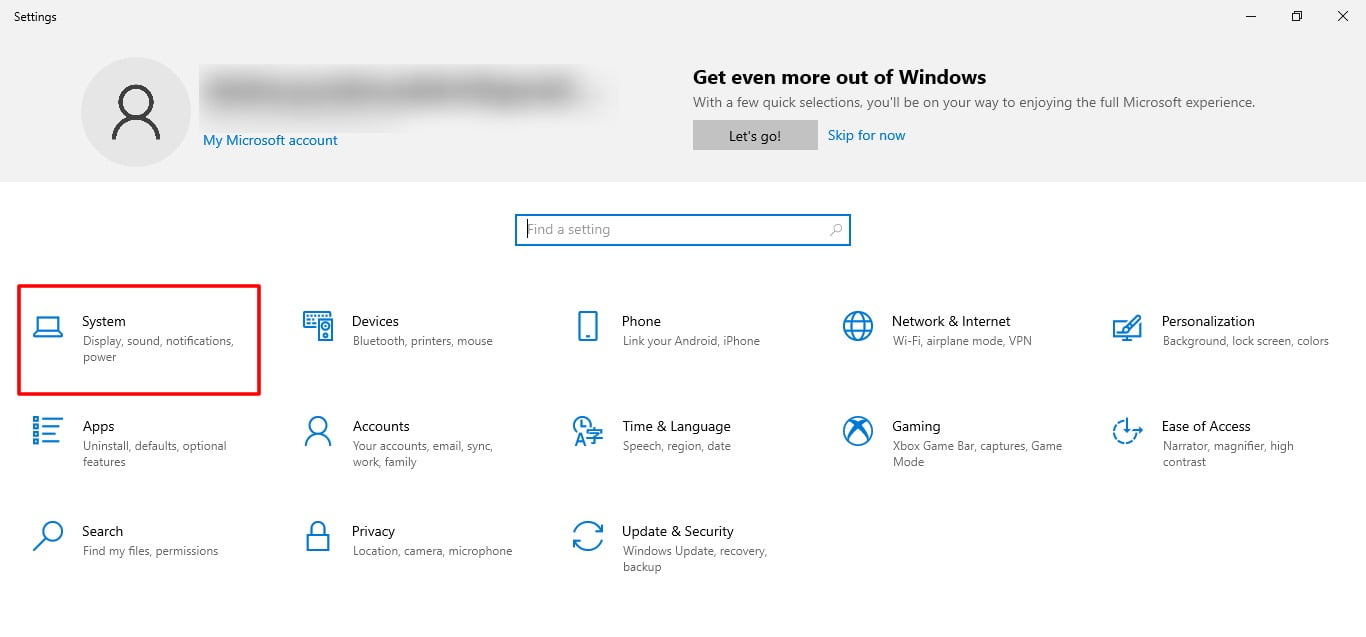
Notifications and actions tab
Open the “Notifications & actions tab” to customize the Notification Center and Quick action panels.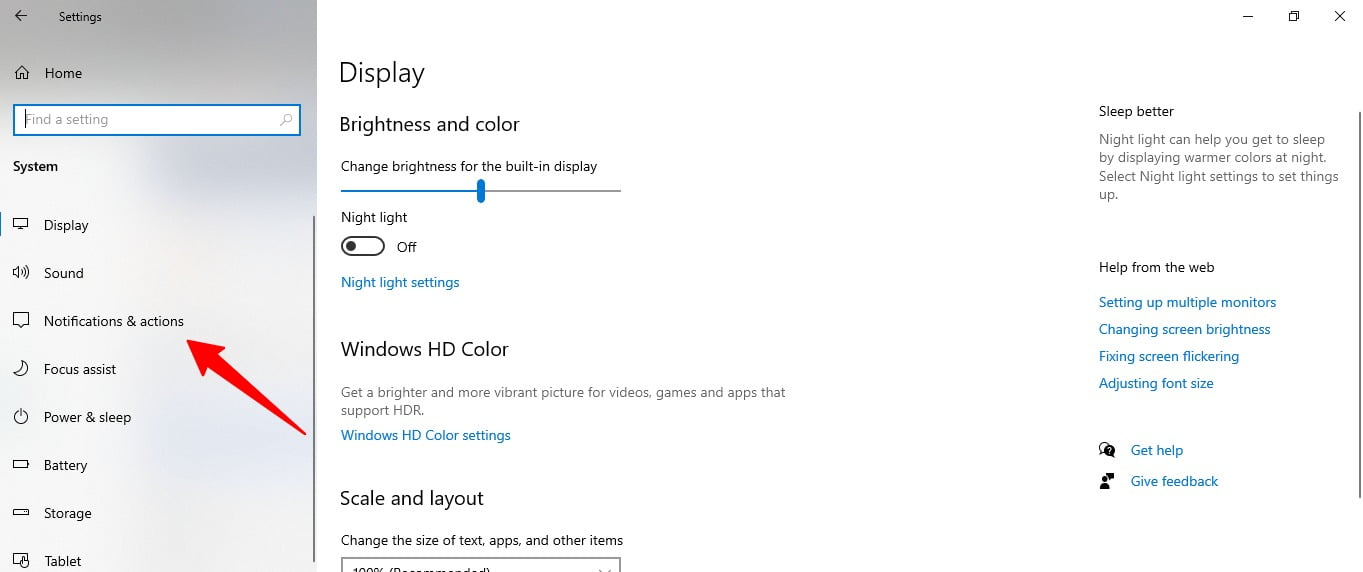
Edit Quick action panel
If you need to customize the Quick action panel, then find “Edit your quick actions” and click on it. The expanded Quick actions panel will suddenly pop up where you can pin and unpin features there. 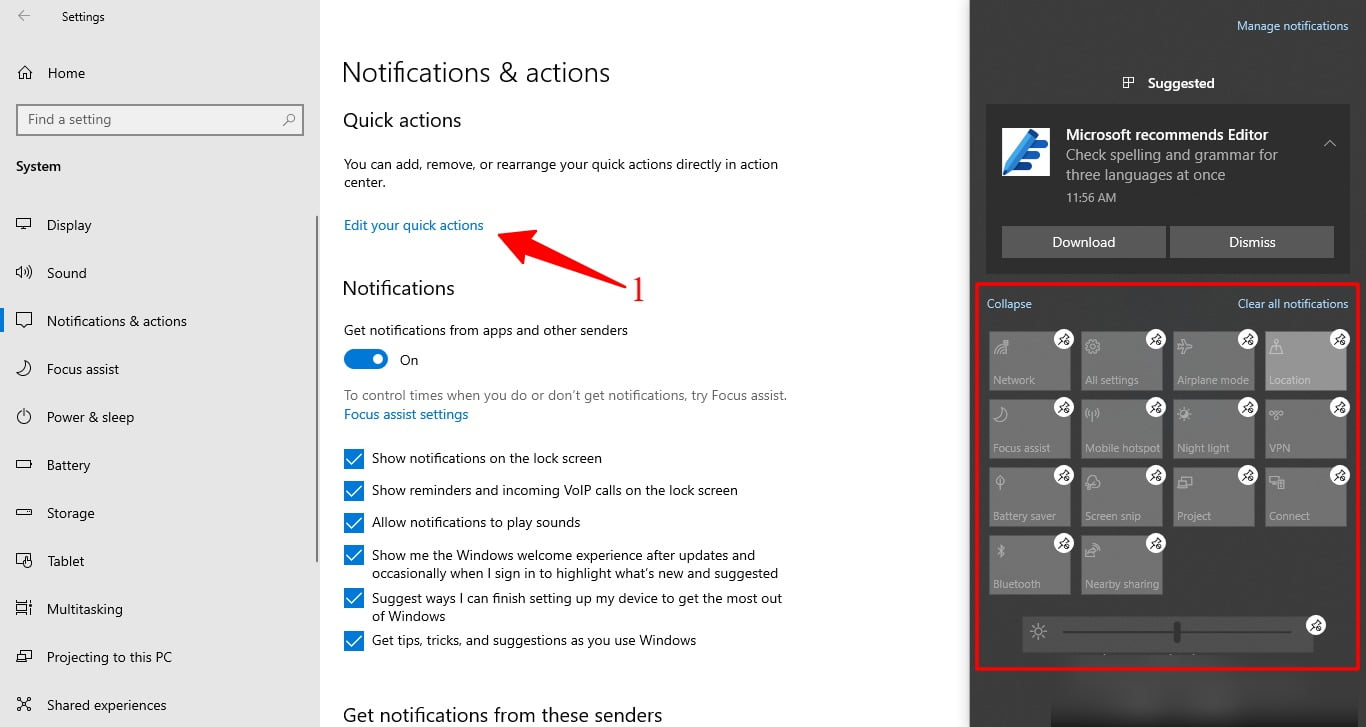
Manage the apps
By scrolling down merely on the same page, you will find “Get notifications from these senders.” Just enable the desired apps and turn off the undesired app. 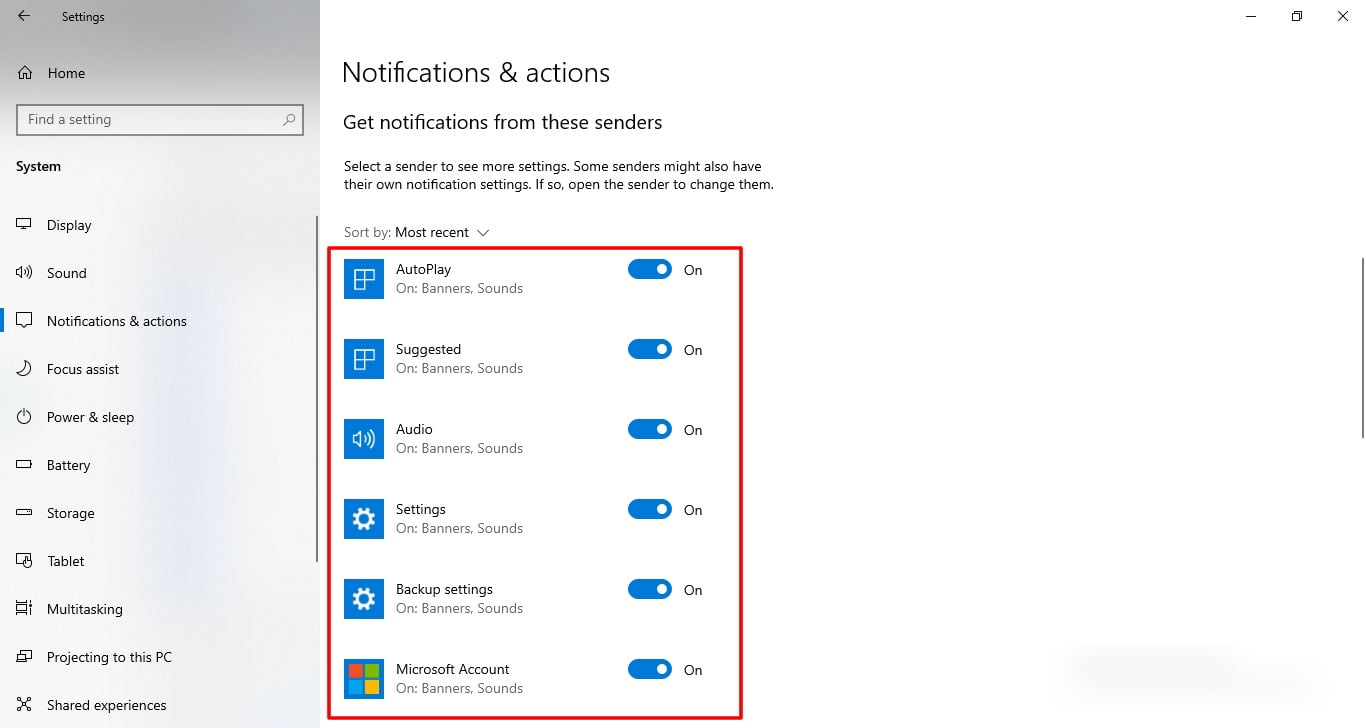
Following these steps, you can manage and configure the Notifications Center on your PC easily.

